A powerful, yet tricky tool is the BIOS unlocking that should be carefully thought and systematically performed. This section provides a useful workflow which can be adopted by the technicians, system builders and IT administrators. Whether it is preparation or verification, each stage is significant to achieve system integrity and the key to success.
Pre-check: Backups, Documentation, Legal Compliance
A system backup is a good place to start before performing any changes. Clonezilla or Macrium Reflect are disk imaging tools to create full disk images. Besides, capture or record existing BIOS configurations to roll back in case of necessity.
- Confirm ownership, or permission, particularly with enterprise or second-hand devices. When performed on devices that are not yours, bypassing BIOS security may break local laws and company policies.
- Make sure the device is charged to the maximum or is connected to the power outlet – a loss of power during the flashing process may result in the device being permanently pretty.
Method: BIOS Unlocking Flowchart
Pick your unlocking option depending on the level of lock and manufacturer of your system:
Step-by-Step Flowchart:
Look Through Hidden Menus
➝ Use key combinations (e.g. Fn + Tab, Ctrl + F1, Shift + F10) during boot.
Success: Unlock settings without invasive acts.
Try to reset CMOS
➝Remove CMOS battery or short motherboard jumper (consult motherboard diagram).
➝ Restart and enter BIOS.
Master Password Tools Use
➝ Record system generated error codes when BIOS login fails 3 or more times.
To create a master password, go to bios-pw.org or biosbug.com.
Flash BIOS Firmware
➝ OEM update tools, or SPI programmer to flash a custom/unlocked ROM.
Toolsing and Command Walkthrough
So, let us take an example of flashing BIOS in a Dell system:
- Start up in DOS or UEFI shell using a ready USB stick.
- Dell utility:
\\ BIOS_IMG.EXE /forceit /log=flashlog.txt
- This may be accessed through a CH341A flasher and software such as AsProgrammer for advanced users, to write a binary .bin image directly to the BIOS chip.
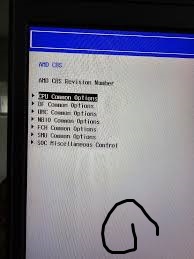
It should be covered by BIOS screenshots (which are not provided here) of the before and after condition – particularly when you unlock additional tabs such as Advanced, Security or Power.
Verification Regression Testing
After unlocking, do a full system testing:
- Boot OS and check hardware detection device manager.
- Perform stress tests (e.g., Prime95, MemTest86+) to ensure thermal and voltage stability.
- Restart several times to check that settings are kept.
Note also any side effects (e.g. broken sleep state, fast boot failure), and keep rollback firmware handy in case.

